Initial Setup: Getting Your Orb Ready
Updated
Setting up your Orb for the first time is quick and straightforward. Follow these steps to get everything powered, connected, and ready for verifications.
Before You Start
1. Unbox & Inspect Your Orb
Before powering on, take a moment to check that everything looks right:
Examine the Orb, look for:
Dents, cracks, or scratches
Any loose or misaligned components
The battery slot — press the spring damper to ensure it moves smoothly
Note:If you spot any damage, pause the setup and contact Support before continuing.
2. Inspect & Charge the Battery
Before inserting the battery, take a moment to check it:
Look for cracks, swelling, or any signs of damage.
If the battery looks damaged, don’t use it — contact Support.
Charge the battery for at least 4 hours, even if the LEDs show partial charge.
Once it’s fully charged, you’re ready to insert it.
3. Insert the Battery & Power On
Here’s how to insert the battery safely and get your Orb running.
Insert the Battery
Hold the Orb securely.
Align the battery like this:
Slide the battery in until it clicks into place.
Power On
Press and hold the Power button (located on the lower back of the Orb) for 3 seconds.
The Power LED will pulse white, meaning the Orb is starting up.
Wait for the boot-up sequence to finish before moving on.
How to Power Off & Remove the Battery
Power Off
Press and hold the Power button for 3 seconds.
The Power LED will turn off.
The internal ring light may stay yellow for a few seconds while the Orb cools down — this is normal.
Wait until all lights are off before removing the battery.
Remove the Battery
Once the Orb is fully off, gently turn it onto its side.
Press the spring clip and slide the battery out slowly.
Store it in a safe place.
Place the Orb upright again on a stable surface.
Add Your Orb in Orb App
Once the Orb is on, continue the setup in Orb App.
1. Confirm Your Delivery

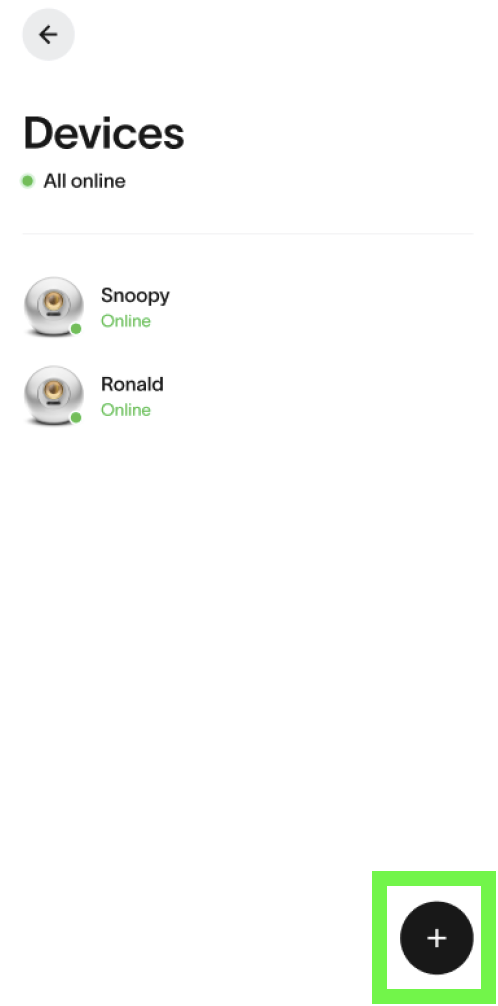
2. Add Your Orb
You can add the Orb by:

Follow the on-screen instructions to complete the process.
3. Connect the Orb (LTE or WiFi)
Your Orb supports LTE or WiFi connectivity, depending on availability.
LTE Connection
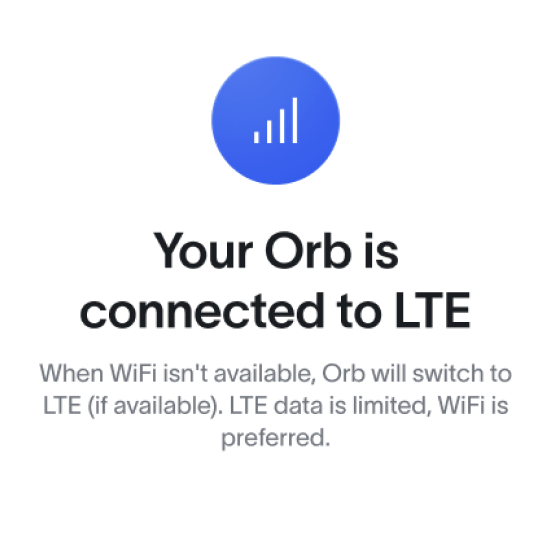
The device includes a pre-installed eSIM.
If LTE coverage is available, it will connect automatically.
If LTE is not available, Orb App will guide you to connect via WiFi instead.
WiFi Setup
If prompted to connect via WiFi:
Enter the network name and password in Orb App.
Network name: avoid spaces and special characters.
Password: at least 8 characters, also without spaces or special characters.
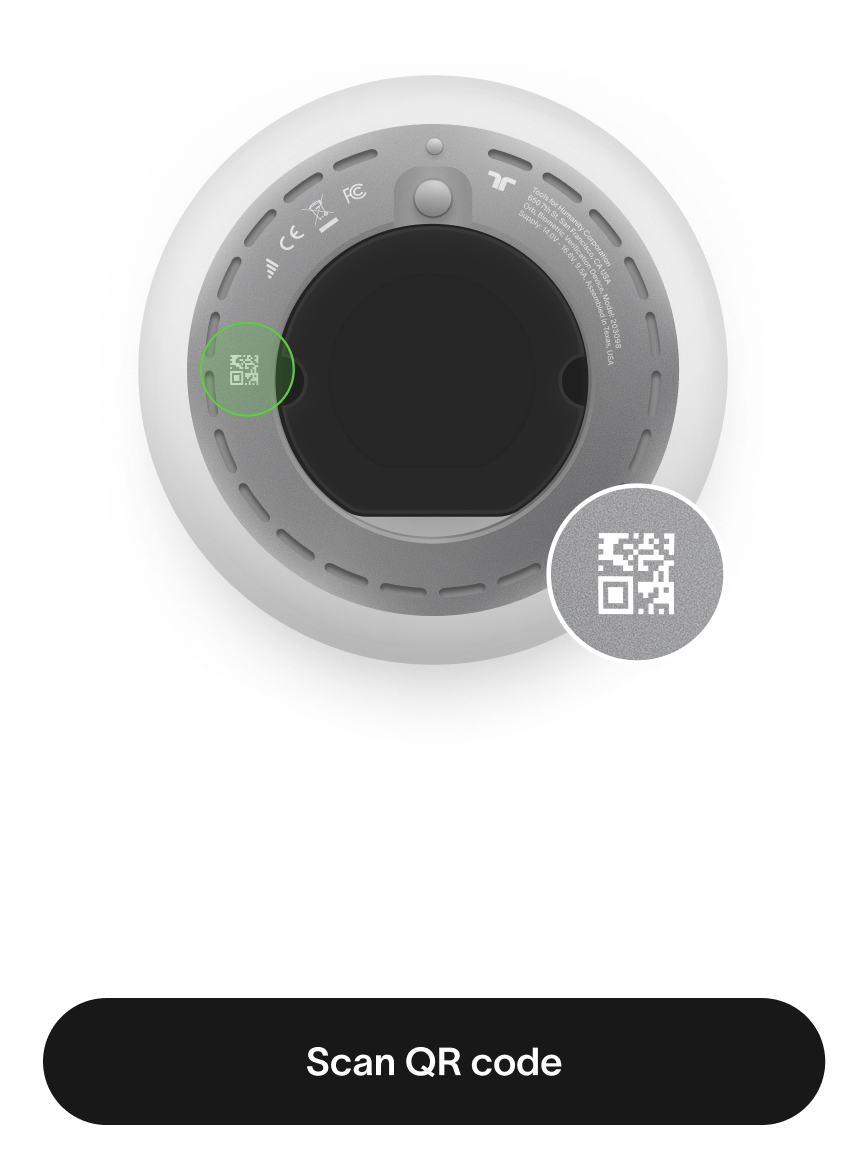
Orb App will generate a WiFi QR code.
Show the QR to the Orb so it can scan and connect.
4. Install Software Updates
New Orbs may arrive with an earlier software version — that’s normal.
Once the Orb is online:
It will automatically download and install any required updates.
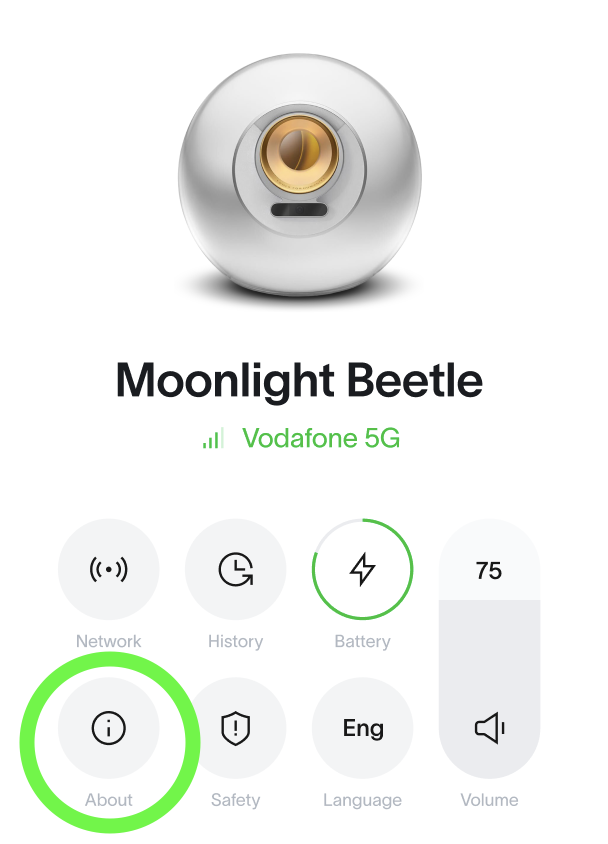
To check the current version, go to: Device → Select Orb → Info (i)
Tip:Wait for all updates to complete before starting verifications.
5. Ready for Verifications
After the software is fully updated, your Orb is ready to start verifications.
You can now continue with your usual Operator QR activation and location setup steps.
Quick Fixes (If Something Isn’t Working)
The Orb won’t turn on
Charge the battery for at least 4 hours.
Make sure it clicked fully into place.
Press and hold the Power button for 3 seconds.
The Orb won’t connect to the network
If LTE isn’t available, try connecting via WiFi.
Recheck the network name and password (no spaces or special characters).
Regenerate the WiFi QR code and scan it again.
The Orb isn’t appearing in Orb App
Translations may differ slightly from the original English content. For the most accurate information, please refer to the article's English version if any discrepancies occur.
<% } %>